
Custom Desalinator Project Nearly Complete!
A couple of months ago I bought a used Village Marine LWM-200 water maker from another sailboat owner. It was used in his boat for the Vic-Maui Race and he no longer had a need for it, and in fact he’d prefer to lighten his boat for racing. The Little Wonder model is pretty simple, essentially a high pressure pump, a reverse-osmosis membrane, a pressure regulator, and a few filters. The ‘M’ in the model indicates it’s a modular unit which can be fit into nooks and crannies of a boat to fit nearly any space available. In our case, the modular install sort of meant lots of work.

Over the past few months I’ve looked at our boat a number of times for a good place to put the water maker components and came up with a couple of options, but all of them involved creating some sort of shelf, board, or bracket and securing it to the hull with epoxy or whatever. Then the pieces would be sort of exposed to people and things being thrown into the space. So I finally decided that I needed to effectively un-modularize it, built a frame into which the components can be mounted, and then the whole frame can be secured as a unit. With that in mind I decided the best place for it would be the back (technically the farthest to-port) of the port side cockpit lazarette. The port lazarette is large as it’s designed for storing TWO life rafts. We only have one life raft AND we have a deck mount for it.
So a few weeks ago I went down there on a 90+F degree day, brought the main high pressure pump and the RO membrane along and mocked up on paper how it could all fit in the lazarette.

This location has pros and cons, but some of the pros include easy access to the cockpit drain to tie in the brine discharge line, access to the cockpit shower water line for fresh water flushing of the membrane, and access to the aft fresh water tank deck fill tube that we can tie the water makers output into. The primary downside is that I need to run power and raw water from down inside the boat up to the lazarette.
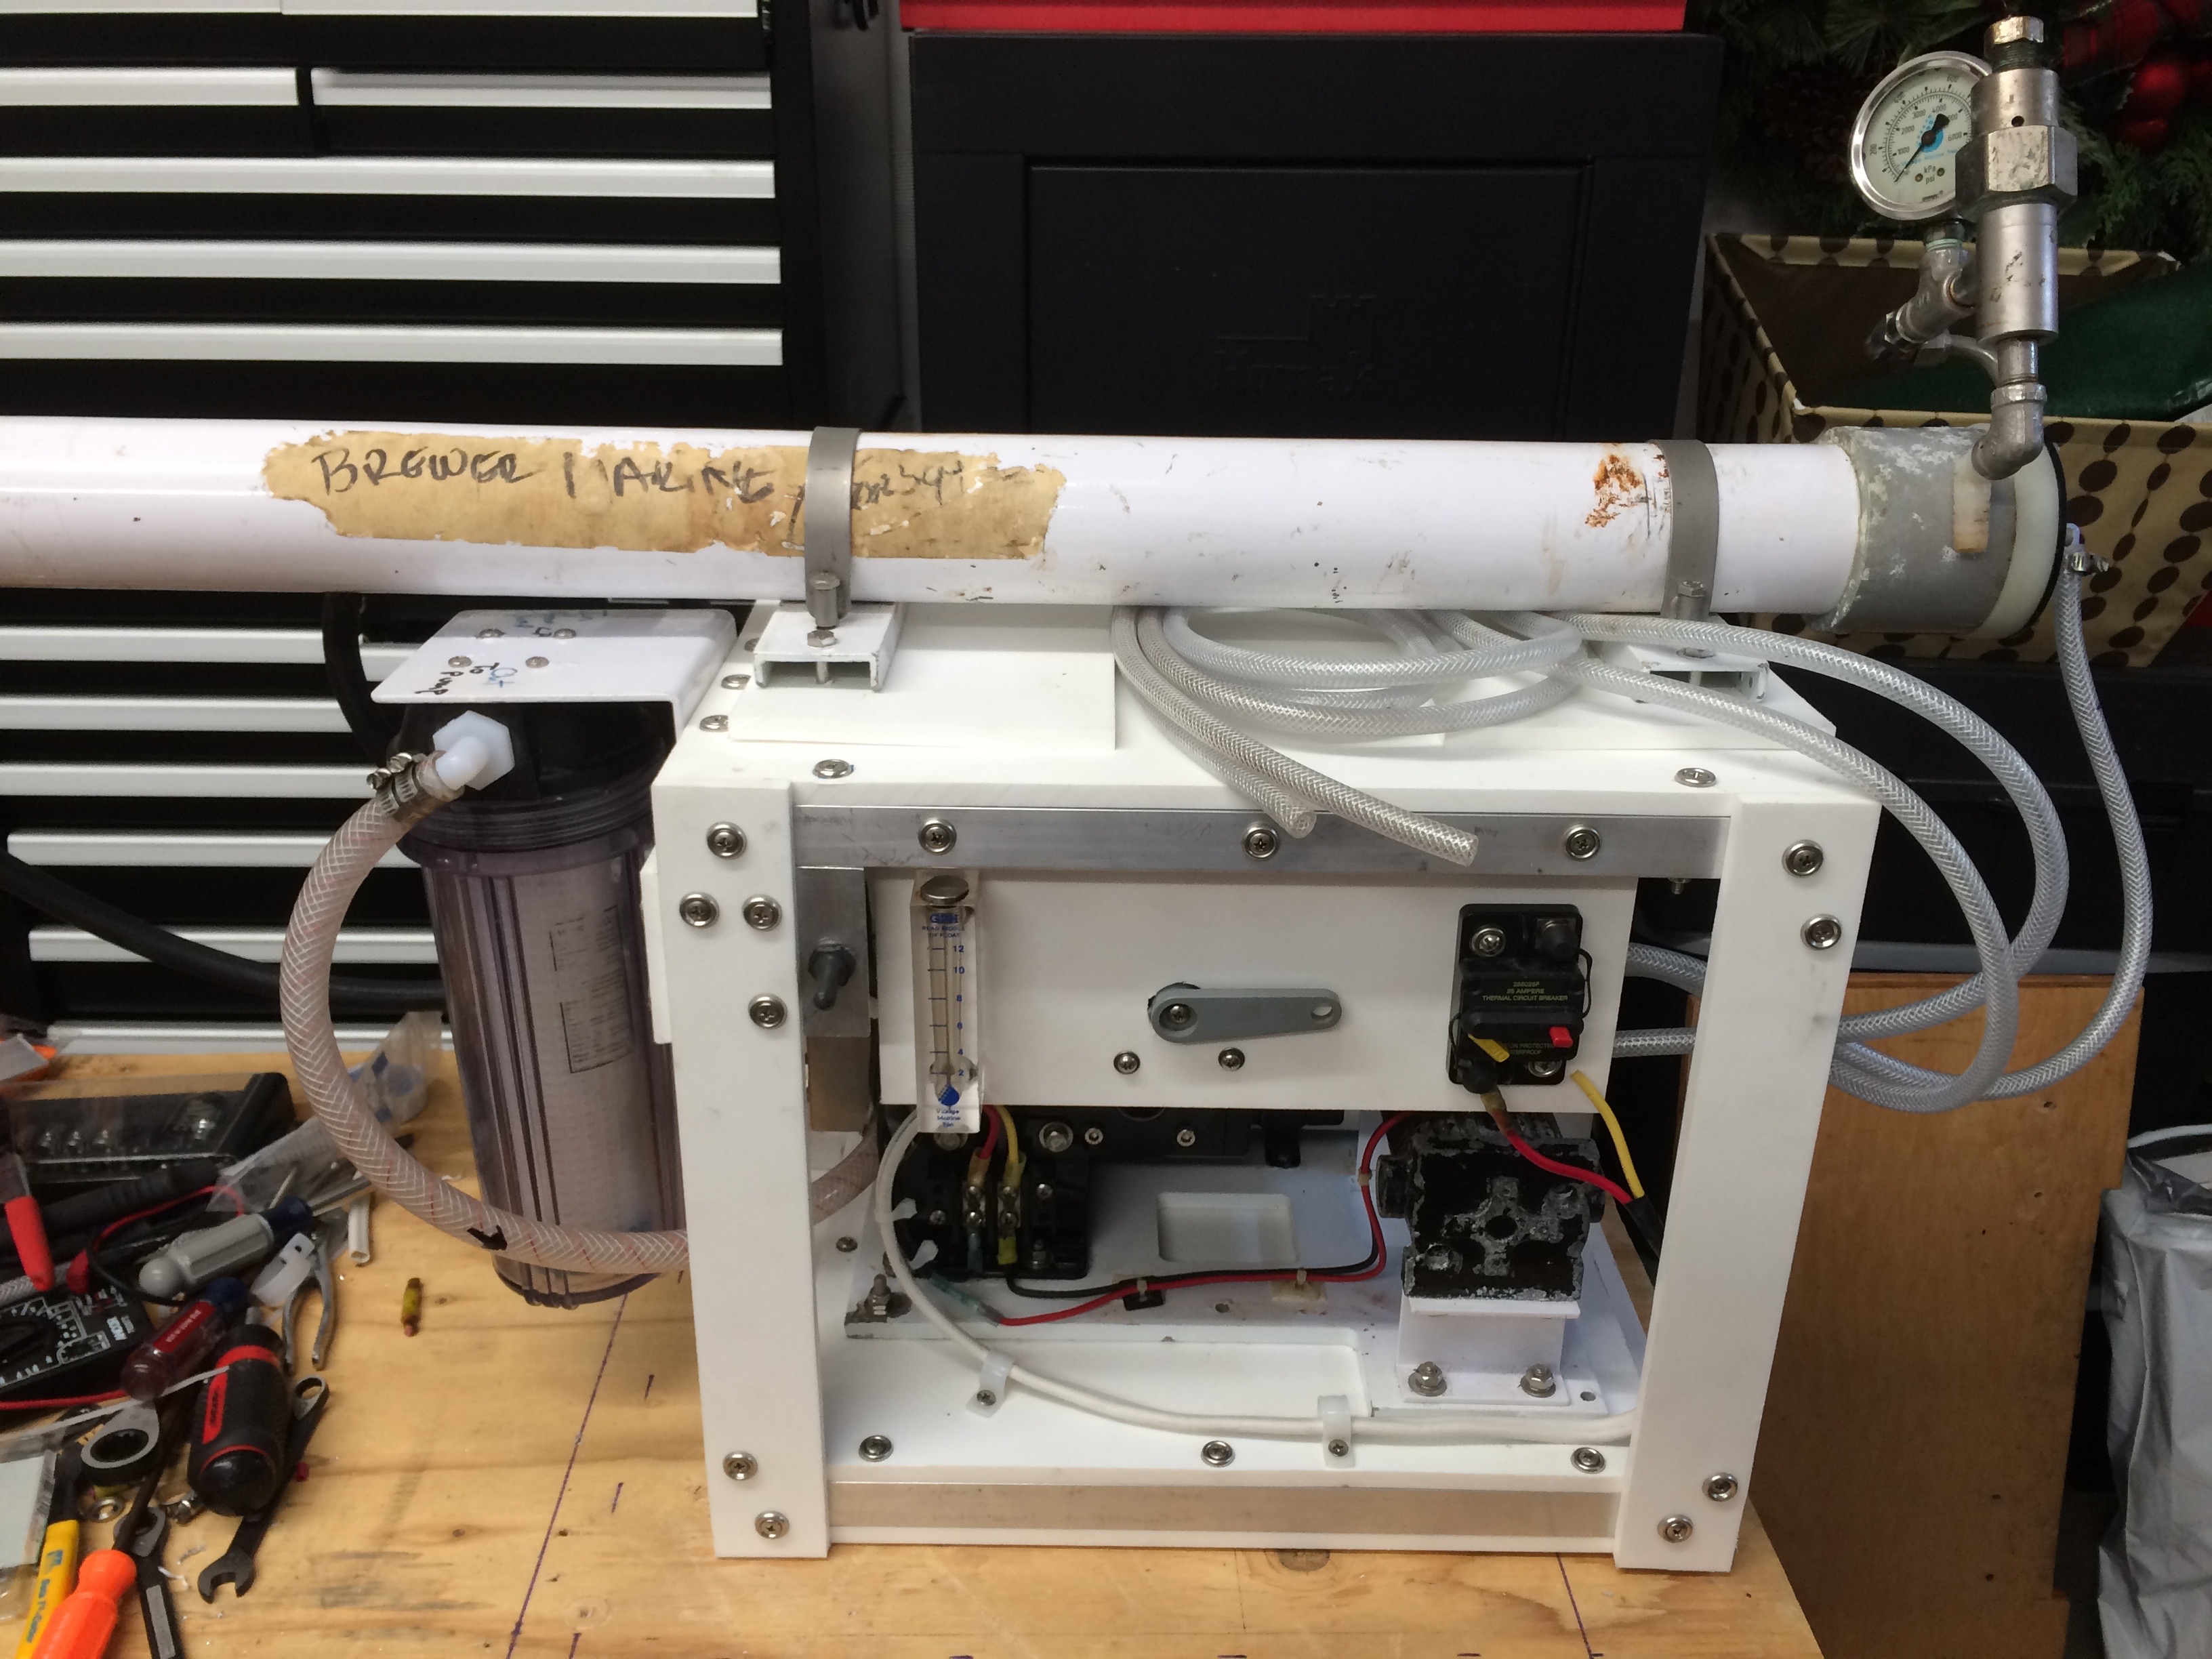
With all the components in my garage at home I’ve spent the last couple of weeks mocking up, acquiring materials, and building a frame and control panel for the water maker. I used King Starboard 3/8″ sheets and 1″ square aluminum tubing, and since I don’t have a welder it’s all screwed and bolted together. I can completely disassemble it if needed. I also made sure that I can access the drive belt, hose fittings, and pump oil fill all without removing anything.

As you can see, the high pressure pump sits inside the frame. The control panel has the main breaker for the unit, the water flow meter, and the fresh water diversion valve to switch from the testing hose to filling the tank. I’ll add labels to it all soon. I also added a switch between the breaker and the motor that drives the high pressure pump. I did this because the boost pump that sits in the bilge and pushes raw water up to the high pressure pump is connected to the same breaker. I wanted to be able to power up the boost pump first and ensure there is water pressure at the high pressure pump inlet before starting up the high pressure pump itself.


So I’ve finally got a the point where I can take the unit to the boat, and put in its home, then secure it in place. Once I do that, I’ll need to spend some time on the boat running the various hoses and electrical. My plan is to get that done next week before our summer boat trip starts. Hopefully I can hit that date.


